Backyard Alchemy
Written by Judi Pettite
Photos courtesy of the Author
I first learned about natural dyes in a class I took at Cal State Fullerton as an undergraduate in the art department. Years later I made the connection between dyes, inks and paint; this was at the same time as I was questioning my use of acrylics paint as an art medium. Acrylic, often touted as non-toxic, has a plastic binder (polyacryllic resin + ammonia) and it’s washed down the drain in thousands of art studios and classes. This troubled me so I decided to investigate there efficacy of natural materials in my art practice. I wanted to become more deeply involved with the materials of art — I grew organic vegetables, frequented farmer’s markets, traded vegetables with neighbors…why couldn’t my color choices reflect the same values…or at least move in that direction? Cultivate color, why not?
My color garden began with marigolds, amaranth, then Japanese indigo with seeds from Rebecca Burgess. I devoured all the natural dye books I could and began to forage for color as much as I grew it. Doing this helped me bring the circle closer, what if my palette was regional in scope? With that idea in mind I began my experiments.
Making ink is straightforward enough, color can be extracted through a solvent, the most common being water. A water-soluble ink is simply a very concentrated dyebath. Walnut hulls and oak galls are plentiful in many wooded locations and make good ink. Other interesting colors found regionally are pokeberry, elderberry, ironwood eucalyptus bark, buckthorn berries and the pisolithus mushroom. The former two, have color that is very sensitive to ph and can be manipulated to change color and while each are delightfully in the violet-magenta range, the color will fade over time in the sunlight. The pisolithus mushroom gives off a range of browns from deep violet brown to cinnamon, to golden brown on paper or fiber. The pisolithus mushroom is lightfast and holds its color on the paper very well as does the many varieties of indigo, including woad.
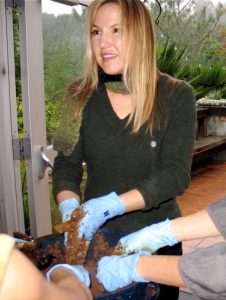
Breaking piso mushrooms
Historically in western art, ink was primarily used for writing or preliminary artist sketches, paint was required for the portraits of nobility and grand landscapes. Paint consists a pigment and a binder.

grinding the pigment
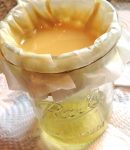
Lake- color separated from liquid
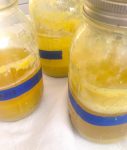
Weld lake pigment settling
A pigment is what gives paint its color, it is a dry fine powder. Earth or soil is already in its powder form and with some sifting It’s ready to be made into paint. Plants, fungi and insects require a lengthier process to become a pigment for paint. To make a pigment that is insoluble in water, one must make a ‘lake’. A lake pigment is the result of a chemical reaction between the color in a dye solution an acid, followed by an alkaline*. A common combination used when making lakes is aluminum sulfate and sodium carbonate. Adding these, alum first, then sodium carbonate to the dye solution creates a foaming reaction—similar in appearance to the reaction one sees with vinegar and baking soda— the color particles then descend to the bottom of the vessel. The sludge of color at the bottom is your pigment.
Once the layers have settled, the clear-ish liquid at the top is drained off, the pigment successively washed by running water through it, the remainder poured through a fine piece of fabric or coffee filter, dried out and is ready to be ground into a paint.
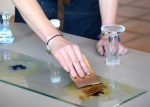
making a paste before grinding a pigment

workshop samples

Indigo Ink
Making paint involves using a muller and a glass plate or marble slab. For watercolor, place about a tablespoon of pigment on the plate, make a well in the center, add about 2 teaspoons of water into the well and using a palette knife, to form a thick paste. Three things may happen here, there is either too much water (add pigment), too little (add water) or just enough. Your powers of observation will serve you well in this endeavor. Every pigment behaves differently, looks different, feels different, sound and smells a little different from the other.
Once the paste is formed, add the binder. Gum Arabic the most popular watercolor binder found in stores; you can experiment with other binders found locally like plum, peach or apricot. Starches like dextrin can be used or casein (milk protein), soymilk, or egg as in egg tempera.
Add the binder in small amounts, a half teaspoon to your paste. Fold it in with the palette knife and grind the pigment together with the muller. In circular motions, grind the materials together, periodically lifting the muller to scrape the paint (it will be spreading outward) back to the center to repeat the exercise. Keep going (a few minutes or so) until your paint appears uniformly smooth. Use it right away; if storing in a tube or watercolor pan, you can add thyme or clove oil to inhibit mold, and glycerin to keep paint pliable when dried.
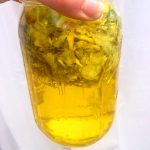
Oxalis dye
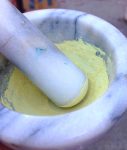
weld pigment
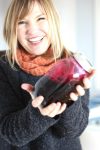
Judi and pokeberry
For oil paint, just swap out the binder and leave out the water. Now, get out a brush and get started, use like any watercolor and enjoy the connection to your regional palette. *This is a general guideline and there are variations depending on the kind of dye one is using.
Judi Pettite lives in Placerville, Ca where she operates BioHue studio and gardens. She is also a member of Northern California Fibershed and the Hangtown Fibers Guild. To see more images and her upcoming workshops, look up the blog section on biohue.com