Have you ever gotten blisters from tying on a cotton warp? Do you have trouble with tension? Want an easier way?
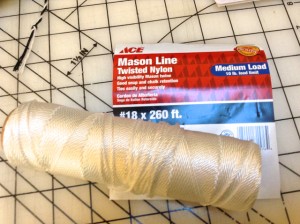
Try lashing on! It’s not as complicated as you might think. All you need is some Mason Line–a smooth, slippery nylon twine available at your hardware store.
Here’s how:
* Wrap the mason line around a stick shuttle or a netting shuttle. Use about 4-6 times the width of your warp. More is always better because you don’t want a knot in the mason line.
* Tie overhand knots every 3/4” to 1” of your warp. They needn’t be precisely the same length.
* Tie the mason line to one end of the apron bar. You can tie it quite far outside your warp selvage area to avoid that initial draw-in.
* Make a plain weave shed to see a division in each knot.
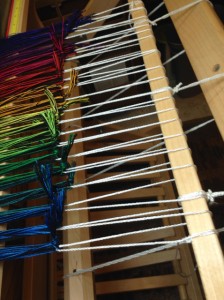
* Insert the mason line through the division in a knot, then over and around the apron bar, then through the next knot. Allow about 6” between the apron bar and the knot. This is the sloppy part–it won’t look right until you finish.
* Continue across the warp, being sure to catch every knot individually. If you loop through two knots your tension won’t equalize.
* Tie the mason line onto the other end of the apron bar.
Now for the fun part: Lightly tighten the tension on the front beam while using your hand to push down across the warp. The mason line will slide along until it equalizes. If it’s uneven, manually adjust the mason line from left to right and back again.
For extra insurance, go to the back of the loom and push down all the way across the warp. Sometimes I use a stick or my forearm to push down evenly.
Your warp should be pretty even. Weave an inch and if any unevenness appears, just adjust the mason line. No untying needed!

Mason Line

Lashing on the loom
Mason line is available at hardware stores. Be sure to burn the ends so it doesn’t unravel. I use a netting shuttle.
It is so much easier on my hands to do it this way. I used to get awful blisters tying cotton warps. Give it a try. And if you have more tips let us all know!