I’m not usually much of a natural dyer. I love the concept of course – I have a strong hunter-gatherer- preserver instinct – but usually the process demands an attention to detail that, well, sometimes bores me. I like the results, but measuring weights, volumes, etc., can sometimes sideline my attention span.
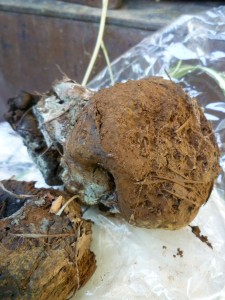
There are certain natural sources that are pretty close to instant gratification, however! Pisolithus arrhizus, commonly known as Dead Man’s Foot or “dog turd”, is one such. According to the Bay Area Mycology Society, Pisolithus is one of those unusual dry “blooming” mushrooms, and show up throughout the Mediterranean climate of Northern CA during our glorious late summer days.
The ones I’m using here were found by my roommate Rachelle, at her place of work in the Sierra Foothills in the “wild landscaped” portion of her office complex. No hiking/poison oak needed to find them! Since I’m going to talk specifically about my dye adventures, I’ll refer you on to BAMS for more information on Pisolithus in specific, and the wonderful world of mushrooms in general: http://www.bayareamushrooms.org/mushroommonth/pisolithus.html
Pisolithus is a substantive dye, meaning you don’t need any mordant/secondary chemicals to help the dye stick to your fibers. All you’ll have to do is boil the mushroom, then simmer fibers. Easy peasy!
Okay. There are some obligatory warnings:
Don’t eat the mushroom. It looks like poop, so you probably won’t be tempted anyways. NEVER EAT WILD-GATHERED MUSHROOMS WITHOUT FIRST HAVING A MYCOLOGIST VERIFY THE SPECIES.
Seriously, mushroom poisoning has some terrifying symptoms, BUT you aren’t going to be poisoned by touching them. Probably won’t get sick even if you touch your tongue to them, but stay safe:
1. Wear gloves/dust mask Pisolithus is full of spores, which is where we get all the lovely pigment.
2. It stains, and also is “dusty”. Protect your health, and don’t breathe in the spores.
3. NEVER use dye equipment for food use. In fact, if you can, do your dyeing outside, especially with natural dyestuffs. Cooking up inedibles can be very stinky and oppressive and can stain and toxicify your kitchen. Housemates will appreciate not being choked out of the house.
The Recipe / Materials List
● 21g total of Pisolithus arrhizus
● non-reactive pot ● gloves ● scale
● wooden spoon ● dust mask
● strainer/cheesecloth● outdoor heating element
● 40 – 100 g (dry weight) fiber: wool or silk yarn, fabric, etc. (linen/cotton also will take up pigment, but I think there may be extra steps for color to fix – more experiments later).
Wool should soak in tepid water for approximately 1 hour prior to dyeing. Pre-soaking is unnecessary for silk. There are two ways you can prep your dye pot to get the pigment ready.
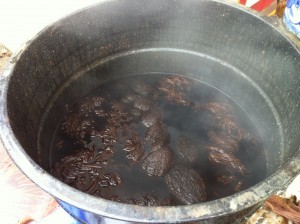
● start the water to boil and toss in the entire mushroom whole. As the water boils, the dye ball will break down with the help of your wooden spoon and the pigmented spores will dissolve slowly or
● start the water to boil, slice up the mushroom, taking care to not breathe spores when breaking up the dye ball. Stir while boiling.
My observations tell me that boiling is critical. The pigment won’t break down into solution unless the water is hot enough. I spent hours watching this happen – cook on high and adjust your temperature down once you are ready for fibers. It’s not an instant process unlike powdered commercial dyes. It will take a couple hours of boiling to incorporate all the color into the water, stir occasionally. It helps to have another project, like knitting or basket making, to give you something to do while monitoring the pot (don’t leave cooking things unattended!)
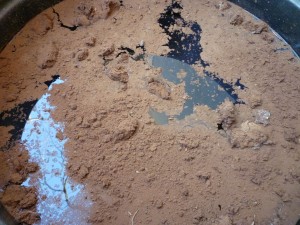
The pisolithus spores tend to sit on top of the dye bath. Stir them in carefully so they dissolve and don’t go airborne.
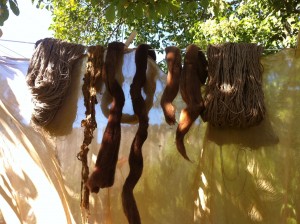
Once the pigment has dissolved, strain out the plant materials for easy cleaning later. Bring temperatures down to just below simmer and gently place fibers into the pot. Stir gently to evenly distribute color. You will see AMAZING color show up right away – don’t be too quick to pull it back out, time is needed to cook the color into the fibers. Cook 1 – 2 hours. If you are extra patient, let the pot cool undisturbed overnight for the most saturation.
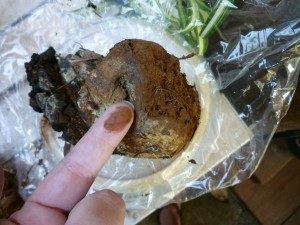
One experiment we did was to separate the dye ball from the stem to see what differing color values we got, if any. One pot was 9 grams dye ball, and the other 12 g stem. The cooking process was identical, including the overnight soak. What we discovered is that the dye ball is far more concentrated (will dye more volume) than the stem, and has a darker, redder tone even on silk. It took less time for more fabric to have a darker color than the stem bath.
However the stem bath had a more golden tone, even though it yielded less dye. Personally, I like layered colors, so in the future I’ll just go with a single bath, getting gold overtones on red-brown, and not worry about all the prep.
Another mini test I did was place sliced up stem directly on the fabric – I got bright spots of gold where contact between fiber and mushroom occurred. This is an exciting enough result to play with further!
Press here to go to the next article
